Monday, March 25, 2024

Send data into D365 FO to call recurring integration via logic apps

Send data into Dynamics 365 FO to call recurring integration via logic apps


1. Register an app in Azure: How to register Azure App for Dynamics 365 FO - Learn from Dynamicscommunity101

This step involves creating a new application registration in the Azure portal. This is a preliminary step required to authenticate and authorize your application to interact with Dynamics 365 Finance & Operations. By registering the app, you obtain an Application ID and a Directory (tenant) ID that is used in subsequent steps to grant access and establish a secure connection.


2. Give access to the Azure app in Dynamics 365: How to add Azure app ref in Dynamics 365 FO - Learn from Dynamicscommunity101

After registering your app in Azure, you need to add the Azure app reference within your Dynamics 365 F&O environment. This involves configuring Dynamics 365 F&O to recognize and authorize the Azure app, typically by specifying the Application ID and setting the necessary permissions, thus allowing the Azure app to interact with Dynamics 365 data and services.


3. Now let's go to the Azure portal: Azure portal - To learn further from Dynamicscommunity101

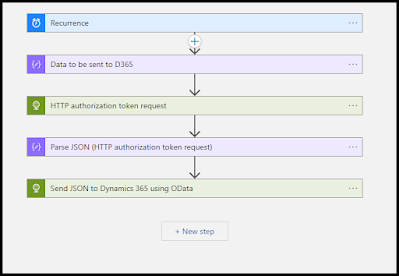
Navigate to the Azure portal to manage app services and configurations, including the setup for the Logic app. Begin by reviewing the Logic app's architecture, then create a Logic app with a "Recurrence" trigger for automatic execution at set intervals. Compose a JSON message for a Dynamics 365 data entity, configure an HTTP trigger for token acquisition, and parse the received JSON to process data. Finally, use an HTTP action to send the structured data to Dynamics 365 F&O, completing the integration flow.


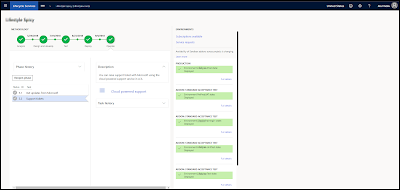
Before starting with the Logic app, below is an overview of the whole Logic app that we created in our blog of Dynamicscommunity101

Logic App Overview Screenshot


Create a logic app with the trigger as Recurrence. You may choose as per your requirements.

Logic App Trigger

Now create a JSON to be sent to the respective Dynamics 365 data entity. In my case, it is a custom data entity.

Logic App Compose

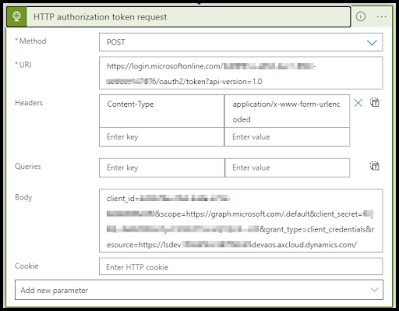
Now we will hit the Microsoft URL to get the access token as shown below.

Logic App HTTP trigger


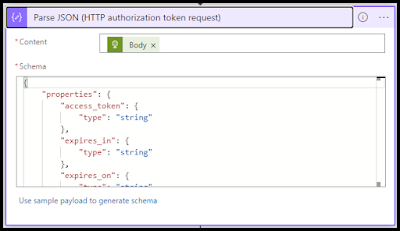
Now the output of the above action will be parsed using the Parse JSON action as shown below.

Logic App parse JSON


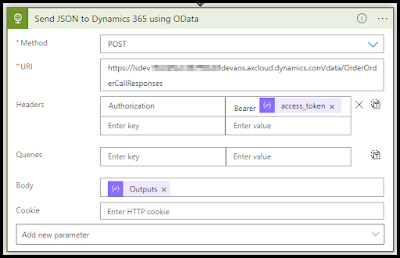
Now we will send the data to Dynamics 365 using HTTP action as shown below.

Sunday, March 24, 2024

Azure app reference in D365 FO

In this blog of DynamicsCommunity101 we will learn How to add Azure app reference in Dynamics 365 FO


Microsoft entra id application form


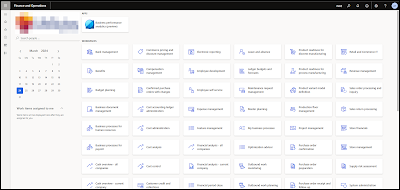
1. Go to your Dynamics 365 FO

Dynamcis 365 home page

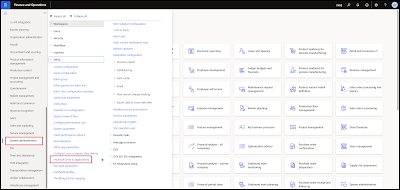
2. Now go to System Administration module > Setup > Microsoft Entra ID applications as shown below

Path for Microsoft Entra ID application

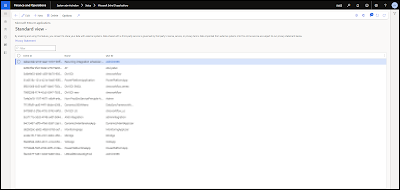
3. A new form will open as shown below

Microsoft entra ID application form final

4. Now add in the client ID for the application, the name of the Microsoft Entra ID applications, and User Id under which you want to give access to this application.


Upload SSRS to blob storage

In this blog of DynamicsCommunity101 we will learn how to generate SSRS reports via code and upload them to blob storage

InventParameters    InventParametersLocal;

        select firstonly InventParametersLocal;


        if(InventParametersLocal.LSAttachmentsToAzureBlobStorage)

        {

            InventJournalTable  inventJournalTableLocal;

            select firstonly inventJournalTableLocal

                where inventJournalTableLocal.RecId == _recId;

            if(inventJournalTableLocal.WorkflowApprovalStatus == InventJournalWorkflowApprovalStatus::Submitted)

            {

                LSInventJournalTransPAContract          poContract;

                LSInventJournalTransPAController        controller  = new LSInventJournalTransPAController();

                SRSPrintDestinationSettings             settings;

                Filename                                fileName    = "Movement Journal Lines - " + inventJournalTableLocal.JournalId + ".pdf";

                controller.parmReportName(ssrsReportStr(LSInventJournalTransPA, Report));

                controller.parmShowDialog(false);

                controller.parmLoadFromSysLastValue(false);


                poContract          = controller.parmReportContract().parmRdpContract();

                poContract.parmInventJournalId(inventJournalTableLocal.JournalId);


                System.Byte[] reportBytes = new System.Byte[0]();

                SRSProxy srsProxy;

                SRSReportRunService srsReportRunService = new SrsReportRunService();

                Microsoft.Dynamics.AX.Framework.Reporting.Shared.ReportingService.ParameterValue[] parameterValueArray;

                Map reportParametersMap;

                SRSReportExecutionInfo executionInfo = new SRSReportExecutionInfo();

                ;

                controller.parmReportName(ssrsReportStr(LSInventJournalTransPA, Report));

                controller.parmShowDialog(false);

                controller.parmLoadFromSysLastValue(false);

                controller.parmReportContract().parmRdpContract(poContract);

                settings = controller.parmReportContract().parmPrintSettings();

                settings.printMediumType(SRSPrintMediumType::File);

                settings.fileName(fileName);

                settings.fileFormat(SRSReportFileFormat::PDF);


                controller.parmReportContract().parmReportServerConfig(SRSConfiguration::getDefaultServerConfiguration());

                controller.parmReportContract().parmReportExecutionInfo(executionInfo);


                srsReportRunService.getReportDataContract(controller.parmreportcontract().parmReportName());

                srsReportRunService.preRunReport(controller.parmreportcontract());

                reportParametersMap = srsReportRunService.createParamMapFromContract(controller.parmReportContract());

                parameterValueArray = SrsReportRunUtil::getParameterValueArray(reportParametersMap);

                srsProxy            = SRSProxy::constructWithConfiguration(controller.parmReportContract().parmReportServerConfig());


                reportBytes         = srsproxy.renderReportToByteArray(controller.parmreportcontract().parmreportpath(),parameterValueArray,settings.fileFormat(),settings.deviceinfo());


                if (reportBytes)

                {

                    System.IO.MemoryStream stream = new System.IO.MemoryStream(reportBytes);

                    str fileContentType = System.Web.MimeMapping::GetMimeMapping(fileName);

                    #define.dotpdf('.pdf')

                    #define.Underscore('_')

                    //StorageCredentials storageCredentials = new StorageCredentials("d365prodattachments", "+ZD2KZ/TtqjzDu/Lrvotjus3KZAhDnJqluEIpDzwcagkMY5Y3IR77M8u6pYoN9f/8bHJA1tg4mE4+AStevsK/Q==");

                    StorageCredentials storageCredentials = new StorageCredentials(InventParametersLocal.LSBlobStorageName, InventParametersLocal.LSBlobStorageConnectionString);

                    CloudStorageAccount storageAccount = new CloudStorageAccount(storageCredentials, true);

                    CloudBlobClient blobClient = storageAccount.CreateCloudBlobClient();

                    //CloudBlobContainer cont = blobClient.GetContainerReference("d365/FR40/MovementJournal");

                    //str path = 

                    CloudBlobContainer cont = blobClient.GetContainerReference(InventParametersLocal.LSBlobStoragePath + '/' +inventJournalTableLocal.JournalId);

                    CloudBlockBlob cloudBlockBlob = cont.GetBlockBlobReference(fileName);

                    cloudBlockBlob.UploadFromStream(stream, null, null, null);

                }

            }

        }


Thank you. This code of Dynamicscommunity101 is related to generate SSRS report and upload to blob storage

Friday, March 22, 2024

Rev D365FO dev experience by Dynamicscommunity101

In this blog of DynamicsCommunity101 we will learn how to Revolutionize your D365FO development experience by Dynamicscommunity101

Revolutionize your D365FO development experience

How to disable system defined buttons in standard form of d365 by Dynamicscommunity101

In this blog of DynamicsCommunity101 we will learn How to disable system-defined buttons in standard form of d365

How to disable system defined buttons in standard form of d365

How To Use Regression suite automation tool (RSAT) For Microsoft Dynamics 365 Finance and Operations

How To Use Regression suite automation tool (RSAT) For Microsoft Dynamics 365 Finance and Operations


Microsoft Link

Button Click COC standard form

In this blog of DynamicsCommunity101 we will learn Dynamics 365 FO COC for Button Click in standard form

COC for button click in standard form in Dynamics 365 FO

[ExtensionOf(FormControlStr(SalesTableListPage, NotForMRP))]

final class LSSalesTableListpage_NotForMRP_Extension

{

    public void clicked()

    {

        FormControl     formButtonControl = any2Object(this) as FormControl;

        FormDataSource  salesTable_ds = formButtonControl.formRun().dataSource(tableStr(SalesTable));

        SalesTable      salesTable = salesTable_ds.cursor(),salesTableUpdate;

        SalesLine       SalesLineLocal;

        CustParameters  CustParametersLocal = CustParameters::find();

        TransDate       LSRequestedShipDateLocal,LSRequestedReceiptDateLocal;

        boolean ret = false;

        try

        {

            ttsbegin;

            if(salesTable.LSNotForMRP == NoYes::No)

            {

                select forupdate salesTableUpdate

                    where salesTableUpdate.RecId == salesTable.RecId;

                salesTableUpdate.LSNotForMRP = NoYes::Yes;

                ttsbegin;

                salesTableUpdate.update();

                ttscommit;

                while select forupdate SalesLineLocal

                    where SalesLineLocal.SalesId == salesTable.SalesId

                {

                    LSRequestedShipDateLocal              = SalesLineLocal.ShippingDateRequested;

                    LSRequestedReceiptDateLocal           = SalesLineLocal.ReceiptDateRequested;


                    SalesLineLocal.LSRequestedShipDate    = LSRequestedShipDateLocal;

                    SalesLineLocal.LSRequestedReceiptDate = LSRequestedReceiptDateLocal;

                    SalesLineLocal.ShippingDateRequested  = CustParametersLocal.LSMRPDate;

                    SalesLineLocal.ReceiptDateRequested   = CustParametersLocal.LSMRPDate;

                    ttsbegin;

                    SalesLineLocal.update();

                    ttscommit;

                }

                info("@LS_HISOL_AY:NotForMRP");

            }

            else

            {

                select forupdate salesTableUpdate

                    where salesTableUpdate.RecId == salesTable.RecId;

                salesTableUpdate.LSNotForMRP = NoYes::No;

                ttsbegin;

                salesTableUpdate.update();

                ttscommit;

                while select forupdate SalesLineLocal

                    where SalesLineLocal.SalesId == salesTable.SalesId

                {

                    LSRequestedShipDateLocal    = SalesLineLocal.LSRequestedShipDate;

                    LSRequestedReceiptDateLocal = SalesLineLocal.LSRequestedReceiptDate;


                    SalesLineLocal.ShippingDateRequested  = LSRequestedShipDateLocal;

                    SalesLineLocal.ReceiptDateRequested   = LSRequestedReceiptDateLocal;

                    SalesLineLocal.LSRequestedShipDate    = CustParametersLocal.LSMRPDate;

                    SalesLineLocal.LSRequestedReceiptDate = CustParametersLocal.LSMRPDate;

                    ttsbegin;

                    SalesLineLocal.update();

                    ttscommit;

                }

                info("@LS_HISOL_AY:ForMRP");

            }

            ttscommit;

        }

        catch

        {

            System.Exception ex = CLRInterop::getLastException();

            error(ex.Message);

        }

        salesTable_ds.reread();


        next clicked();


    }


}


D365 FO Database Explained

Main DB Explained on Dynamicscommunity101


Microsoft Dynamics 365 Finance and Operations Database Explained

Monday, March 18, 2024

Saturday, March 16, 2024

Contract methods

Difference between PrePromptModifyContract and PreRunModifyContract

Now to understand difference between PrePromptModifyContract and PreRunModifyContract in Dynamics 365, we will provide different points for both as shown below

PrePromptModifyContract:

1. Purpose: This method is used to modify the contract class before the report dialog (prompt) is shown to the user. It allows for altering the parameters or setup of the report before the user interacts with the prompt.

2. Timing: It is invoked after the contract class has been initialized but before the report parameter dialog is rendered.

3. Customization: Enables customization of the report's parameters, such as setting default values, hiding certain parameters, or modifying parameter options based on specific logic.

4. Use Case: Particularly useful for dynamically adjusting the report parameters based on the context of the report's execution, such as pre-filtering options or changing visibility of parameters.

5. Scope: Affects only the presentation and options of the parameter dialog; it does not directly influence the report's execution logic.


PreRunModifyContract:

1. Purpose: This method is used to modify the contract class after the user has filled in the parameters but before the report is run. It allows for last-minute adjustments to the contract based on user input.

2. Timing: It is executed right before the report is generated after the user has submitted the parameter dialog.

3. Customization: Provides a chance to adjust or validate the report parameters or to change the report's behavior based on the final user input.

4. Use Case: Ideal for applying business logic that needs to consider user inputs, such as validating parameter combinations or modifying the data query based on the selected parameters.

5. Scope: Directly impacts how the report runs and processes data, allowing for dynamic adjustments to the reporting logic based on user-selected parameters.


SSRS report for current record

SSRS report in Dynamics 365 FO to get the current record from the form and run for it


Contract class:

[DataContractAttribute]
class LS_SafteyCalendarReportContract
{
    str ID;

    [DataMemberAttribute('ID')]
    public str parmID(str _ID = ID)
    {
        ID = _ID;
        return ID;
    }

}


Controller class:

class LS_SafteyCalendarReportController extends SrsReportRunController
{
    public static LS_SafteyCalendarReportController construct()
    {
        return new LS_SafteyCalendarReportController();
    }

    public static void main(Args args)
    {
        LS_SafteyCalendarReportController controller = LS_SafteyCalendarReportController::construct();

        controller.parmArgs(args);
        controller.parmReportName(ssrsReportStr(LS_SafteyCalendarReport, Report));
        controller.parmShowDialog(false);
        controller.startOperation();
    }

    protected void prePromptModifyContract()
    {
        LS_SafetyCalendarHeader         LS_SafetyCalendarHeaderLocal;
        LS_SafteyCalendarReportContract contract;
        FormDataSource                  fds;
        contract = this.parmReportContract().parmRdpContract() as LS_SafteyCalendarReportContract;
        fds = args.record().dataSource();
        LS_SafetyCalendarHeaderLocal = args.record();
        contract.parmID(LS_SafetyCalendarHeaderLocal.IDD);
    }

}


DP Class:

[SRSReportParameterAttribute(classStr(LS_SafteyCalendarReportContract))]
class LS_SafteyCalendarReportDP extends SRSReportDataProviderBase
{
    LS_SafteyCalendarTmp reportTmp;

    [SRSReportDataSetAttribute(tableStr(LS_SafteyCalendarTmp))]
    public LS_SafteyCalendarTmp getTmp()
    {
        select reportTmp;
        return reportTmp;
    }

    public void processReport()
    {
        LS_SafteyCalendarReportContract contract = this.parmDataContract() as LS_SafteyCalendarReportContract;
        
        LS_SafetyCalendarHeader LS_SafetyCalendarHeaderLocal;
        
        anytype x = contract.parmID();
        
        select firstonly LS_SafetyCalendarHeaderLocal
            where LS_SafetyCalendarHeaderLocal.IDD == contract.parmID();
        
        reportTmp.clear();
        reportTmp.EmployeeName = HcmWorker::find(LS_SafetyCalendarHeaderLocal.HcmWorkerRecId).name();
        reportTmp.insert();
    }

}


Just create a report, put that report in an output menu item, and apply that menu item to the relevant form


D365 to Dataverse

How to Connect Dynamics 365 with a new Microsoft Dataverse Instance

LCS to Dataverse

Prerequisites:

A. Make sure The Power Platform environment geography is the same logical geography where your finance and operations apps are deployed.

B. You must have System Administrator permissions in Dataverse.

C. You must have an Environment Manager or Project Owner role in Lifecycle Services.

D. You must be signed in by using an account from the customer tenant that owns the Lifecycle Services project.

E. A valid Dynamics 365 Finance, Dynamics 365 Supply Chain Management, Dynamics 365 Commerce, Dynamics 365 Project Operations, Dynamics 365 Human Resources, Dynamics 365 Unified Operations Plan, or AX Enterprise license must be assigned to your account.


1. Setup on the Power Platform Integration tab

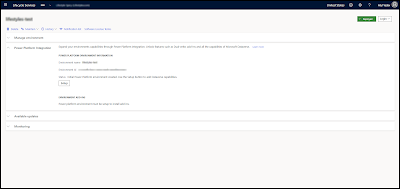
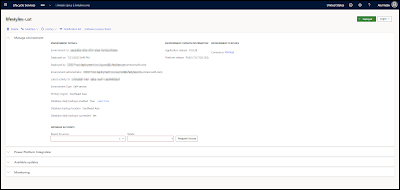
    Go to LCS, go to your environment, and select the Power Platform Integration FastTab. If the Setup button is available on it, you can configure your connection to Dataverse. [How to open an environment in LCS]

LCS environment page

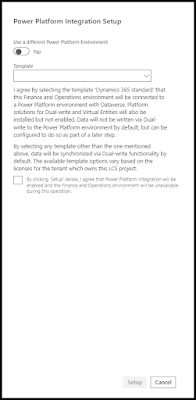
a new pop-up will come as shown below

Conversion menu

Click on the template field and you will see 3 lookup values as shown below, choose according to your requirement (In my case I selected Dynamics 365 standard)

Three types

2. Confirm that you want to proceed.

A dialog box appears and indicates that the action can't be reversed. You will be asked to put in your name, then the confirm button will be enabled.

PPAC warning

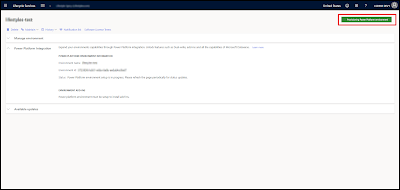
Wait for some time for the provisioning to be completed

Deploying screen

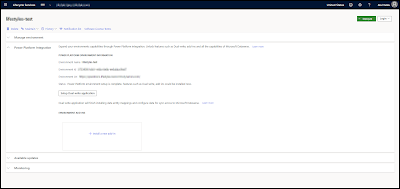
Mostly after 15 minutes, it will be completed

Completed LCS screen

Once provisioning the power platform is done, you can check the Environment in PPAC

How to open the PPAC environment for Dynamics 365

Tada!!

Please note: 

Because you're using an existing Dataverse instance and linking with the finance and operations apps environment, you must remember the disconnected Power Platform environment that was created when the finance and operations environment was created isn't deleted. You'll need to manually delete the disconnected Power Platform environment.

If you plan to keep the Power Platform environment, note that there isn't a Dataverse instance on it, and you can't use Dataverse capabilities and features such as the Export to Data Lake add-in, dual-write, and virtual tables.

Microsoft reference

PPAC

Connect finance and operations apps with a new Microsoft Dataverse instance

Master planning in Dynamics 365 FO

Master planning in Dynamics 365 FO

Configure workspace in Visual Studio when the working folders are already mapped

Configure workspace in Visual Studio when the working folders are already mapped

PPAC environment for D365

In this blog of DynamicsCommunity101 we will learn How to open the PPAC environment for Dynamics 365

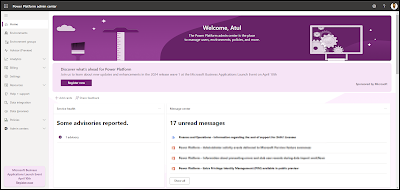
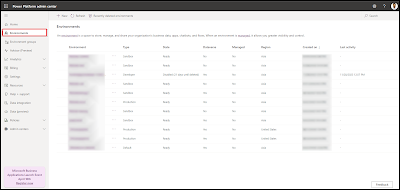
Go to PPAC, You will see as shown below

PPAC home

Click on Environments in the left side panel as shown below

PPAC environment section highlight

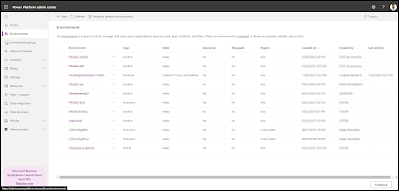
A new screen will open showing all the environments, it will also show the Dynamics 365 environments that you have created in LCS

PPAC environment

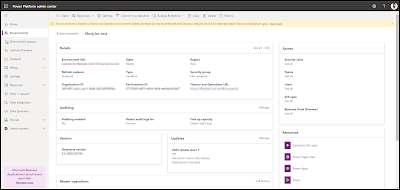
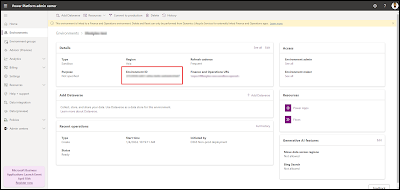
Click on the environment name that you would like to open, it will show the details of that environment

PPAC environment details

Open environment in LCS

In this blog of DynamicsCommunity101 we will learn How to open any environment in LCS Dynamics 365 FO


LCS sign in page

Go to LCS

click on Sign in, sign in with your credentials

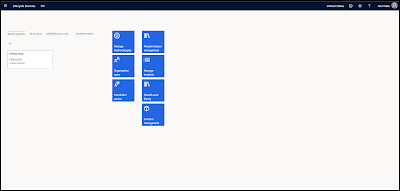
Now you will see the LCS home page as shown below

LCS home page

Left side you will see the project, click on it, and you will see a window as shown below

Environment list page

Now on the right side, you can see the Production and Default Sandbox and Add-on T2 environments, click on Full details and you will see the details of that environment.

Environment detail page

Thursday, March 14, 2024

Connect D365 to Dataverse

In this blog of Dynamics Community 101 we will learn about How to Connect Dynamics 365 FO with an existing Microsoft Dataverse instance


LCS to PPAC

Prerequisites:

A. Make sure The Power Platform environment geography must be the same logical geography where your finance and operations apps are deployed.

B. You must have System Administrator permissions in Dataverse.

C. You must have an Environment Manager or Project Owner role in Lifecycle Services.

D. You must be signed in by using an account from the customer tenant that owns the Lifecycle Services project.

E. A valid Dynamics 365 Finance, Dynamics 365 Supply Chain Management, Dynamics 365 Commerce, Dynamics 365 Project Operations, Dynamics 365 Human Resources, Dynamics 365 Unified Operations Plan, or AX Enterprise license must be assigned to your account.

1. Setup on the Power Platform Integration tab

    Go to LCS, go to your environment, and select the Power Platform Integration FastTab. If the Setup button is available on it, you can configure your connection to Dataverse. [How to open an environment in LCS]

LCS environment detail page

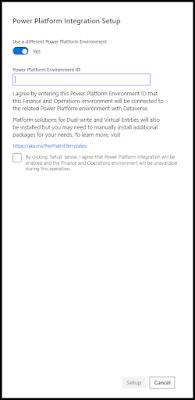
a new pop-up will come as shown below

PPAC confirmation page

tick the button, then a new field will come for environment ID as shown below

PPAC confirmation yes dialog

Environment ID for PPAC can be taken from this Link

2. Confirm that you want to proceed.

A dialog box appears and indicates that the action can't be reversed. You will be asked to put in your name, then confirm button will be enabled.

PPAC confirmation user name dialog box

Wait for some time for the provisioning to be completed

Deploying page

Mostly after 15 minutes, it will be completed

Deployed page lcs

Once provisioning the power platform is done, you can check the Environment in PPAC

How to open PPAC environment for Dynamcis 365

Tada!!

Please note: 

Because you're using an existing Dataverse instance and linking with the finance and operations apps environment, you must remember the disconnected Power Platform environment that was created when the finance and operations environment was created isn't deleted. You'll need to manually delete the disconnected Power Platform environment.

If you plan to keep the Power Platform environment, note that there isn't a Dataverse instance on it, and you can't use Dataverse capabilities and features such as the Export to Data Lake add-in, dual-write, and virtual tables.

Microsoft reference

PPAC

Connect finance and operations apps with an existing Microsoft Dataverse instance


Get PPAC Environment ID

In this blog of DynamicsCommunity101 we will learn How to get Power Platform Environment ID | PPAC

Sign in to the Power Platform Admin Center at Link

PPAC home page

Navigate to the "Environments" section in the left navigation pane.

PPAC environment list

Click on the environment for which you want the ID.

The Environment ID is displayed in the URL in your browser's address bar, and it may also be visible in the environment details pane.

PPAC environment detail page

Look for a GUID (Globally Unique Identifier), which is a 36-character string with digits and dashes. This is the Environment ID you're seeking.

Monday, March 11, 2024

How to create an azure function

In this blog of DynamicsCommunity101 we will learn How to create an Azure function

How to Create Azure Function App from Azure Portal: Create Azure Function

How to create HttpTrigger in Azure functions Azure Portal: Http Trigger

How to Publish Azure Function From Visual Studio | Direct Deploy vs Run From Package File: Publish Azure Function

Friday, March 1, 2024

API Authentication method

Secure Connections: API Access Control


Authentication methods


It is important to make sure that only approved users and applications can access or make changes to resources in our API.

Here are some common ways to secure REST APIs:

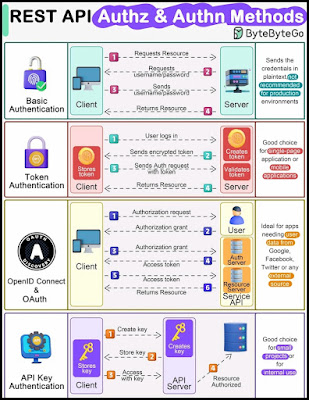
1. 𝗕𝗮𝘀𝗶𝗰 𝗔𝘂𝘁𝗵𝗲𝗻𝘁𝗶𝗰𝗮𝘁𝗶𝗼𝗻

This sends a username and password with each request to the API. It’s straightforward, but not very secure unless used with encryption like HTTPS.

Good for simpler apps where advanced security is not critical. Should be combined with encrypted connections.

2. 𝗧𝗼𝗸𝗲𝗻 𝗔𝘂𝘁𝗵𝗲𝗻𝘁𝗶𝗰𝗮𝘁𝗶𝗼𝗻

This uses tokens, like JSON Web Tokens (JWT), that are exchanged between the client app and server. Login information is not sent with each request.

Better for more secure and scalable apps where not sending credentials each time is essential.

3. 𝗢𝗽𝗲𝗻𝗜𝗗 𝗖𝗼𝗻𝗻𝗲𝗰𝘁 𝗮𝗻𝗱 𝗢𝗔𝘂𝘁𝗵

These allow limited third-party access to user data without exposing passwords. OpenID Connect handles user authentication and OAuth handles authorization.

Perfect when third-party services need controlled access to user data, like when integrating with Google, Facebook, or Twitter.

4. 𝗔𝗣𝗜 𝗞𝗲𝘆 𝗔𝘂𝘁𝗵𝗲𝗻𝘁𝗶𝗰𝗮𝘁𝗶𝗼𝗻

This gives unique keys to users or apps which are sent in request headers or query parameters. Simple to implement but may not be as robust as token or OAuth methods.

Good for basic access control when security needs are moderate. Allows access to specific API functionalities without complex user permissions.

Securing our API should be a top concern. The method chosen should match the sensitivity of the data and the required protection level.


Source: