Tuesday, November 29, 2022

How to create a service bus in Azure portal

Go to Azure portal: Azure

Click on "Create a resource"


Now search in the bar "Service bus" and select "Service Bus" as shown in the picture


A new window will popup like below


Click on create, and a new window will open like below


Now fill in the details like below,
Create a Resource group in my case I have created: DynamicsCommunity101RG
Give a Namespace name: DynamicsCommunity101ServiceBus
Select Premium or Standard pricing, because in the Basic, you won't be able to create Topics


Now click on "Review and Create", Now once the validation is passed, click on create


The deployment will be initialized, Once the Deployment is complete
Go to the Service bus, and you will see a screen like below


Now go to Topic in the left panel as shown in the picture,


Now click on "Topic" to create a topic

a new window will popup like the picture below


Now fill in the details like shown in the picture below


Now go to Topic, and inside topic go to subscriptions as shown in the picture below


After going to the subscription, you will see like below picture,


Now click on Subscription to create a subscription

A new window will open like below

Now fill in the name and Max delivery count, and click on create as shown in the picture below


A new subscription will be created

Now go to Service bus that we created, then "Shared access policies", and create a policy by clicking add as shown in the picture


Now a new form will pop up, fill in the name and click on manage as shown in the picture


Now click on create, Now a shared access policy will  be created

Save, Now copy the primary connections string, and save it in a key vault

How to create a key vault

Friday, November 25, 2022

Difference between Power Automate and Logic Apps


Power automate:
1. It is available as part of O365 applications
2. Power automate is a browser-based application which means you can modify it only using the browser
3. Microsoft Flow can be accessed and modified in a Mobile app
4. For Power Automate, either you pay on a per-flow or per-user basis.
5. If you have a relatively simple application to create then you should go for Power Automate.
6. If your application is using Office 365 / Dynamics application then you can probably pick Power Automate.
7. If Citizen Developers are creating the application, you can go with Power Automate.

Logic apps:
1. Logic apps is a part of the Azure platform
2. You can work with Logic apps in a browser as well as in a visual studio designer.
3. Logic Apps cannot be operated from a mobile app
4. For Logic Apps you pay as you use. That means whenever Logic apps run, connectors, triggers, and actions are metered and based on that the user is charged.
5. If you want to create an application that has complicated requirements then you should go for Logic Apps
6. If your application is mostly using Azure services, then you can go ahead with Azure Logic Apps 
7. If Pro developers are working, then you can go ahead with Logic Apps without any hesitation.

Thursday, November 24, 2022

Azure Service Bus


Azure Service Bus is a fully managed enterprise message broker with message queues and publish-subscribe topics (in a namespace). Service Bus is used to decouple applications and services from each other, providing the following benefits:

Summary: Data is transferred between different applications and services using messages. A message is a container decorated with metadata and contains data. The data can be any kind of information, including structured data encoded with common formats such as the following ones: JSON, XML, Apache Avro, and Plain Text.

Queues:

Messages are sent to and received from queues. Queues store messages until the receiving application is available to receive and process them.
Messages in queues are ordered and timestamped on arrival. Once accepted by the broker, the message is always held durably in triple-redundant storage, spread across availability zones if the namespace is zone-enabled. Service Bus never leaves messages in memory or volatile storage after they've been reported to the client as accepted.
Messages are delivered in pull mode, only delivering messages when requested. Unlike the busy-polling model of some other cloud queues, the pull operation can be long-lived and only complete once a message is available.

Topics:

You can also use topics to send and receive messages. While a queue is often used for point-to-point communication, topics are useful in publish/subscribe scenarios.
Topics can have multiple, independent subscriptions, which attach to the topic and otherwise work exactly like queues from the receiver side. A subscriber to a topic can receive a copy of each message sent to that topic. Subscriptions are named entities. Subscriptions are durable by default but can be configured to expire and then be automatically deleted. Via the Java Message Service (JMS) API, Service Bus Premium also allows you to create volatile subscriptions that exist for the duration of the connection.
You can define rules on a subscription. A subscription rule has a filter to define a condition for the message to be copied into the subscription and an optional action that can modify message metadata. For more information, see Topic filters and actions. This feature is useful in the following scenarios:
You don't want a subscription to receive all messages sent to a topic.
You want to mark up messages with extra metadata when they pass through a subscription


Some Termonologies for this blog :

1. Messaging: Transfer business data, such as sales or purchase orders, journals, or inventory movements.

2. Namespaces: A namespace is a container for all messaging components (queues and topics). Multiple queues and topics can be in a single namespace, and namespaces often serve as application containers.
A namespace can be compared to a server in the terminology of other brokers, but the concepts aren't directly equivalent. A Service Bus namespace is your own capacity slice of a large cluster made up of dozens of all-active virtual machines. It may optionally span three Azure availability zones. So, you get all the availability and robustness benefits of running the message broker at an enormous scale. And, you don't need to worry about underlying complexities. Service Bus is serverless messaging.

3. Decouple applications: Improve the reliability and scalability of applications and services. Producers and consumers don't have to be online or readily available at the same time. The load is leveled such that traffic spikes don't overtax a service.

4. Load balancing: Allow for multiple competing consumers to read from a queue at the same time, each safely obtaining exclusive ownership of specific messages.

5. Topics and subscriptions: Enable 1:n relationships between publishers and subscribers, allowing subscribers to select particular messages from a published message stream.

6. Transactions: Allows you to do several operations, all in the scope of an atomic transaction. For example, the following operations can be done in the scope of a transaction.
Obtain a message from one queue.
Post results of processing to one or more different queues.
Move the input message from the original queue.
The results become visible to downstream consumers only upon success, including the successful settlement of the input message, allowing for once-only processing semantics. This transaction model is a robust foundation for the compensating transactions pattern in the greater solution context.

7. Message sessions: Implement high-scale coordination of workflows and multiplexed transfers that require strict message ordering or message deferral.
If you're familiar with other message brokers like Apache ActiveMQ, Service Bus concepts are similar to what you know. As Service Bus is a platform-as-a-service (PaaS) offering, a key difference is that you don't need to worry about the following actions. Azure takes care of those chores for you.
Worrying about hardware failures
Keeping the operating systems or the products patched
Placing logs and managing disk space
Handling backups
Failing over to a reserve machine

8. Advanced features: Service Bus also has advanced features that enable you to solve more complex messaging problems. The following sections describe these key features:

9. Message sessions: To realize a first-in, first-out (FIFO) guarantee in Service Bus, use sessions. Message sessions enable joint and ordered handling of unbounded sequences of related messages.

10. Auto-forwarding: The auto-forwarding feature enables you to chain a queue or subscription to another queue or topic that is part of the same namespace. When auto-forwarding is enabled, Service Bus automatically removes messages that are placed in the first queue or subscription (source) and puts them in the second queue or topic (destination).

11. Dead-lettering: Service Bus supports a dead-letter queue (DLQ) to hold messages that cannot be delivered to any receiver, or messages that cannot be processed. You can then remove messages from the DLQ and inspect them.

12. Scheduled delivery: You can submit messages to a queue or topic for delayed processing. For example, to schedule a job to become available for processing by a system at a certain time.

13. Message deferral: When a queue or subscription client receives a message that it's willing to process, but for which processing isn't currently possible because of special circumstances within the application, the entity can defer retrieval of the message to a later point. The message remains in the queue or subscription, but it's set aside.

14. Transactions: A transaction groups two or more operations together into an execution scope. Service Bus supports grouping operations against a single messaging entity (queue, topic, subscription) within the scope of a transaction.

15. Filtering and actions: Subscribers can define which messages they want to receive from a topic. These messages are specified in the form of one or more named subscription rules. For each matching rule condition, the subscription produces a copy of the message, which may be differently annotated for each matching rule.

16. Auto-delete on idle: Auto-delete on idle enables you to specify an idle interval after which the queue is automatically deleted. The interval is reset when there is traffic on the queue. The minimum duration is 5 minutes.

17. Duplicate detection: If an error occurs that causes the client to have any doubt about the outcome of a send operation, duplicate detection takes the doubt out of these situations by enabling the sender to resend the same message, and the queue or topic discards any duplicate copies.

18. Shared access signature (SAS): Role-based access control, and managed identities
Service Bus supports security protocols such as Shared Access Signatures (SAS), Role Based Access Control (RBAC), and Managed identities for Azure resources.

19. Geo-disaster recovery: When Azure regions or datacenters experience downtime, Geo-disaster recovery enables data processing to continue operating in a different region or datacenter.

20. Security: Service Bus supports standard Advanced Message Queuing Protocol (AMQP) 1.0 and HTTP/REST protocols.
Wednesday, November 23, 2022

How to use Postman with Dynamics 365 FO

 To use postman in Dynamics basically, we need to follow 2 steps:

1. Register the app in the Azure portal.

How to register Azure app for Dynamics 365 FO


2. Connection with the postman :

Download and install postman from the following link: Download

Open postman and click on new


A new popup window will open, select "Collections"


Name it as per your needs, in my case, I am renaming as "Dynamics 365 F&O"

Now click on Type and select OAuth 2.0


A new form will pop up, fill in the following information


Callback URL: Dynamics 365 F&O URL
Auth URL: https://login.microsoftonline.com/common/oauth2/authorize?resource=https://its-dev01XXXXXXXXXXXXXXXXdevaos.axcloud.dynamics.com/
{
Auth URL = A + B
where A: https://login.microsoftonline.com/common/oauth2/authorize?resource=
and B: Dynamics 365 F&O URL
}
Access token URL: You may take from the azure app you just created in the First step
Client ID: eXXXXXX7-XXXX-YYYY-ZZZZ-476XXXXXXX23
Client ID will be the Application ID from the Azure portal


Now click on "Get new access token"
It should ask for your credentials, fill in the details and an access token will be generated, like below


Click on "Use Token"
Now click on "Add a request"


Now a new form will open like below


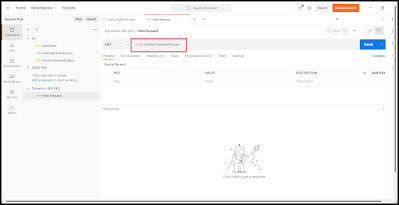
Now we are testing using a "GET" request for the Customer group data entity
Fill in the mentioned area like in the below picture, and replace {{URL}} with your Dynamics 365 F&O URL


Now click "Send". You will get the data like below


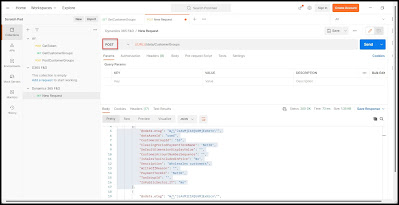
Now for the "POST" request, select the "Post" like below


Now go to "Headers" and create new content-Type = application/json


Now go to Body, select raw, and then select Text, put in the data that we want to send to dynamics 365 F&O, and click "Send"


Data sent to Dynamics 365 F&O


Tada!!!

Thursday, November 17, 2022

How to register Azure App for Dynamics 365 FO

Go to Azure portal

Select "Azure Active Directory"


Now click on "App registrations"


Now click on "New registration"


Now enter the name and select the Supported account types as per need

and select Redirect URI as per your requirement


Now click on Register

Now the app will look like this


Now click on API permissions


Now click on "Add permission"


A new form will pop up like this


browser to "Dynamics ERP"


A new form will popup like this, select delegated permissions and tick all the permissions

Now click on "Add permissions"


Now go to "Certificates & secrets"

Add "New client secret" for authentication


A new popup will come like this


fill in the description and the expiry


copy the value as it will be turned into *, once you refresh the page.

Tuesday, November 15, 2022

BYOD vs Data Lake in D365 FO


BYOD : 

When following a BYOD approach, native table level access does not exist in D365 F&O. To achieve functionality akin to this, a set of custom entities, “replicating” the raw table structure is typically built to mimic the underlying structures in the D365 F&O database.


The custom entities are built in C# and require specialized skills to build and maintain. Complicating matters further, the custom entities then need to be deployed through the D365 F&O development lifecycle (development, Tier 1,2, etc.) to the production environment.


The typical ERP development lifecycle is a SLOW and deliberate process to ensure the stability and robustness of the system. As a result, the process of making any changes to the data environment can be painstakingly slow, IMPACTING the data and analytics teams’ ability to deliver updates and changes to the business.

As a result, the BYOD method can hamper the data and analytics team’s speed of response, system enhancements and any additional development to the data warehouse, downstream semantic models, and reports. This is because any new fields or tables, needed for the enhancement, can take weeks or longer to become available due to the dependency on code promotion in the ERP development lifecycle. 

Once the BYOD entities are published, data is then “synchronized” on a scheduled basis to an Azure SQL database, which forms the typical input point for the data warehousing process. While this seems like a simple process, it is filled with several technical and process-related challenges. 


EXPORT TO DATA LAKE : 

By contrast, the Export to Data Lake functionality is designed and built with robustness and simplicity in mind. The Export to Data Lake functionality allows you to select raw tables, to be exported to the data lake, directly in the D365 F&O front-end application. This greatly simplifies the process of adding to and enhancing the downstream data warehouse and analytics environment. 


At the core of the process is the Change Data Capture (CDC) process that constantly synchronizes data between the D365 F&O environment and a predetermined Azure Data Lake folder/directory structure.


In the Azure Data Lake, data is stored in a .CSV file structure, per table and changed data is constantly being fed in a similar structure to the data lake.


Using the data in the Azure Data Lake as the starting point for your typical data warehouse process allows you the following:


Align the architecture of your analytical environment with the recognized best practices for a Modern Data Architecture through the use of Azure Data Lake and Azure Synapse Analytics.

Get access to data in a much more timely manner to improve accurate decision-making and insights into operational analytics and reporting.

Provide internal data customers with near real-time access to data.

Create a robust and reliable, enterprise-grade method of extracting data from your ERP system, thereby minimizing unplanned downtime and improving how data is made available to internal customers.


Data in the lake is stored as CSV files in a folder structure maintained by the system. The folder structure is based on data organization in finance and operations apps. For example, you will see folders with names such as Finance, Supply Chain, and Commerce, and within these folders, you will see sub-folders with names such as Accounts Receivable or Accounts Payable. Further down the hierarchy, you will see folders that contain the actual data for each table. Within a table-level folder, you will see one or more CSV files as well as metadata files that describe the format of the data.


Once the features are enabled and working, the first significant difference when comparing the BYOD and Export to Data Lake lies in the way entities and tables are handled.


As mentioned, a key principle of building a data & analytics environment is to use the lowest-level data structures (tables) from the sources system.

Link

Conclusion : 

Data lake: 1

BYOD    : 0

Monday, November 14, 2022

Dialog box YesNoCancel Dynamics 365 FO


CODE :        

        DialogButton                            diagBut;

        str strMessage = "Do you want to continue";

        str strTitle = "Title";

        diagBut = Box::yesNoCancel(

        strMessage,

        DialogButton::No, // Initial focus is on the No button.

        strTitle);

        if (diagBut == DialogButton::No)

        {

            info("Operation stoped.");

        }

        else if(diagBut == DialogButton::Yes)

        {

            Info("Clicked yes");

        }

        else

        {

            Info("canceled");

        }